10+ Years Experience
Specialist Resin Flooring
Enquire Today For A Free No Obligation Quote
Installing resin flooring can be a complex task, but with proper guidance and step-by-step instructions, you can achieve professional results. Resin flooring offers a durable, aesthetically appealing, and easy-to-maintain option for various spaces. In this tutorial, we will break down the process of installing resin flooring into manageable steps, allowing you to navigate through the installation like a pro.
Before we dive into the installation process, let’s understand what resin flooring is and explore its benefits. Resin flooring is a type of seamless flooring system that consists of a mixture of resin and hardener, creating a strong and durable surface.
The benefits of resin flooring are numerous. Firstly, it provides exceptional durability and longevity, making it a suitable choice for high-traffic areas. Resin flooring offers aesthetic appeal, allowing you to create a seamless and visually pleasing surface. Lastly, it requires minimal maintenance, saving you time and effort in the long run.
There are different types of resin flooring available, including epoxy flooring, polyurethane flooring, and polyaspartic flooring. Each type has its unique characteristics and suitability for different environments.
To ensure a successful resin flooring installation, proper preparation is crucial. This involves gathering the required tools and materials, as well as ensuring that the substrate is properly prepared. Following these steps will lay the foundation for a smooth and professional installation.
In the following sections, we will provide a detailed step-by-step guide to installing resin flooring. From surface preparation to the final topcoat application, each step will be explained thoroughly. We will also share tips for achieving a professional finish and provide guidance on maintenance and care for your newly installed resin flooring.
By following this tutorial, you will gain the necessary knowledge and skills to install resin flooring like a pro, transforming your space with a durable and visually appealing flooring solution.
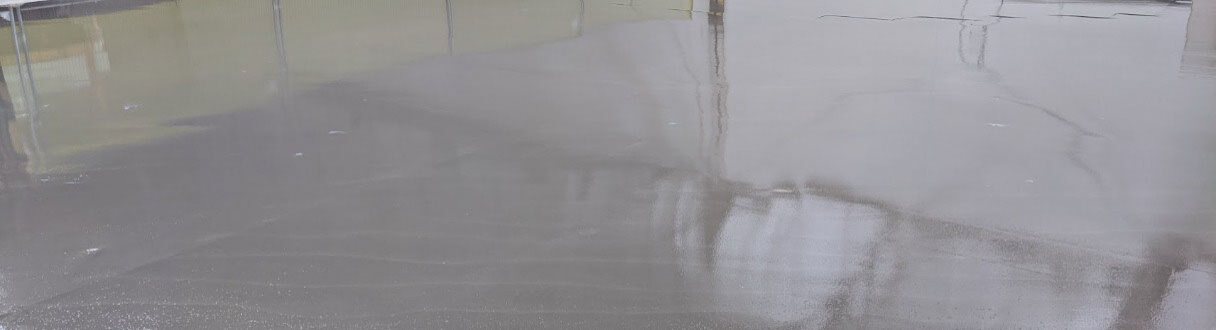
Resin flooring is a flooring system that uses a combination of resins and hardeners to create a durable, seamless surface. It is commonly used in industrial and commercial settings due to its high resistance to chemicals, abrasions, and impacts. Resin flooring is also known for its hygienic properties, as it is easy to clean and maintain. This type of flooring is available in various finishes, such as epoxy, polyurethane, and methyl methacrylate (MMA), allowing for customization based on specific requirements. Installing resin flooring requires proper surface preparation, accurate mixing of materials, and skilled application techniques.
Did you know that resin flooring can last up to 20 years with proper maintenance?
Discover the remarkable advantages of resin flooring. Uncover the secrets behind its durability and longevity, the irresistible aesthetic appeal it brings to any space, and the ease of maintenance it offers. Get ready to be amazed by the facts, figures, and real-life examples that will show you why resin flooring is the ultimate choice for professionals. Say goodbye to ordinary floors and prepare to step into a world of exceptional benefits.
Resin flooring is known for its exceptional durability and longevity, which makes it a popular choice for commercial and industrial spaces. Its ability to withstand heavy foot traffic, impact, and chemicals contributes to its long lifespan. Additionally, resin flooring is resistant to abrasion, stains, and moisture, further enhancing its durability. There are several key factors that contribute to the durability and longevity of resin flooring:
These qualities make resin flooring a reliable and long-lasting solution for a wide range of commercial and industrial applications. Whether in warehouses, factories, or retail spaces, resin flooring offers a cost-effective and high-performing flooring option.
Aesthetic appeal is an important aspect to consider when selecting resin flooring. The following are some reasons why resin flooring is visually appealing:
Resin flooring has become increasingly popular due to its aesthetic appeal and versatile design options. Whether you’re aiming for a sleek and modern look or a more personalised and unique design, resin flooring can help you achieve the desired aesthetic for your space.
Resin flooring has been used for centuries, dating back to ancient civilizations such as the Egyptians and Romans. These civilizations discovered the beauty and durability of resins and used them to create stunning decorative surfaces in their homes and buildings. Over time, resin flooring has evolved and improved, combining aesthetics with functionality to create the visually appealing flooring solutions we have today.
Maintaining resin flooring is easy due to its easy maintenance properties. Here are some tips to keep your resin flooring looking its best:
Regularly sweep or vacuum to remove dirt and debris.
Wipe up spills promptly to prevent staining.
Use a mild detergent and water solution for regular cleaning.
Avoid abrasive cleaners or tools that could damage the surface.
Perform routine inspections for any signs of damage or wear.
By following these simple maintenance practices, you can ensure the longevity and durability of your resin flooring while keeping it looking pristine. Fun Fact: Resin flooring is known for its high scratch resistance, making it a popular choice for high-traffic areas.
Types of Resin Flooring
Looking to install resin flooring like a pro? Let’s explore the various types that you can choose from. From epoxy flooring to polyurethane flooring and polyaspartic flooring, each sub-section will unveil the unique features and benefits of these resin flooring options. So, whether you’re seeking durability, chemical resistance, or a glossy finish, this section has got you covered. Get ready to dive into the world of resin flooring and discover the perfect fit for your space.
Epoxy flooring is a popular choice for both residential and commercial spaces due to its durability, versatility, and aesthetic appeal. Here are some key points to consider when it comes to epoxy flooring:
Epoxy flooring provides a reliable and visually appealing solution for various spaces, offering durability, customisation options, and ease of maintenance. Consider these factors when choosing the best flooring option for your needs.
Polyurethane flooring is a popular choice for a range of commercial and industrial spaces due to its durability, versatility, and aesthetic appeal. Here are some key points to note about polyurethane flooring:
When considering polyurethane flooring, it is important to assess the specific requirements of your space and seek advice from a professional to ensure proper installation and maintenance. Regular cleaning and periodic resealing will help extend the lifespan of your polyurethane flooring.
Polyaspartic flooring is a type of resin flooring that offers several advantages for commercial and industrial spaces.
Consider polyaspartic flooring for its durability, installation efficiency, versatility, and aesthetic options. It’s an excellent choice for commercial spaces seeking a long-lasting and visually appealing flooring solution.
To begin the process of installing resin flooring like a professional, it is important to first prepare for the task at hand. In this section, we will learn about the necessary steps to get started. This includes gathering all the required tools and materials, as well as ensuring proper preparation of the substrate. These factors are crucial in establishing a solid foundation for a successful resin flooring installation. So, let’s roll up our sleeves and get ready to transform your space with a sleek and long-lasting resin floor.
Gathering the required tools and materials is an essential step in preparing for the installation of resin flooring. To ensure a smooth process, here are the key items you will need:
Pro-tip: Before starting the installation, ensure that you have all the tools and materials ready and organized. This will save you time and ensure a seamless application process.
Before installing resin flooring, it is important to ensure proper substrate preparation. This will help to achieve a successful and durable result. Follow these steps to ensure proper substrate preparation:
By following these steps, you can ensure proper substrate preparation, which will create a solid foundation for your resin flooring installation. This will contribute to the longevity and performance of your resin floor.
Are you looking to install resin flooring like a professional? You’ve come to the right place! In this comprehensive guide, we will walk you through the step-by-step process of installing resin flooring. From preparing the surface to incorporating decorative elements, we have all the information you need. Get ready to learn the essential steps and techniques for creating a flawless resin floor. Let’s dive in and turn your flooring dreams into a reality!
To achieve a professional finish when installing resin flooring, it is crucial to thoroughly prepare the surface. This step-by-step guide will walk you through the first step of surface preparation:
Clean the surface: Remove all dirt, dust, and debris from the area to be coated.
Repair any damage: Fill cracks, holes, and imperfections in the surface to ensure a smooth and even base.
Remove existing coatings: If there are any old coatings or sealants, strip them off to create a clean and bare surface.
Etch or grind the surface: Depending on the type of resin flooring system, use either an acid-based etching solution or mechanical grinding to prepare the surface for proper adhesion.
Vacuum and clean again: After the surface is prepped, thoroughly clean and vacuum to remove any remaining dust or debris.
By following these steps, you can ensure that the surface is properly prepared for the next stages of installing resin flooring.
Priming the substrate is a crucial step in the installation process of resin flooring. This step is necessary to ensure proper adhesion and achieve a smooth and durable finish. Here is a step-by-step guide on how to effectively prime the substrate:
Priming the substrate before applying the resin ensures better bonding and enhances the overall performance and longevity of the flooring system.
When it comes to adding decorative elements to resin flooring, there are several steps to follow:
By following these steps, you can enhance the appearance of your resin flooring by adding beautiful decorative elements, creating a unique and personalised space.
Applying a topcoat is an important step in the installation of resin flooring. It adds an extra layer of protection and enhances the overall appearance of the flooring. Here are the steps involved in applying a topcoat:
True story: Sarah, a homeowner, decided to install resin flooring in her kitchen. She diligently followed the step-by-step process and applied a topcoat as instructed. The end result was a beautiful and durable floor that withstood heavy traffic and spilled liquids. Sarah was delighted with her decision and enjoyed the easy maintenance and stunning aesthetic appeal of her new resin flooring.
To achieve a professional finish when installing resin flooring, you need to pay attention to detail and follow these tips:
| Surface Preparation: | It is important to properly clean and prepare the surface to ensure good adhesion and minimize imperfections. |
| Priming: | Apply a suitable primer to promote adhesion and prevent moisture-related issues. |
| Mixing Ratio: | Follow the manufacturer’s instructions to mix the resin and hardener in the correct ratio. |
| Application Technique: | Use a roller or trowel to evenly spread the resin, working in small sections to avoid drying or pooling. |
| Smooth Finish: | Ensure a smooth finish by eliminating bubbles and imperfections using a spiked roller or a squeegee. |
| Topcoat: | Apply a clear topcoat for added protection and to enhance the appearance of the floor. |
Proper maintenance and care for resin flooring is crucial to ensure its longevity and keep it looking its best. Here are some steps to follow:
Regular cleaning: Sweep or vacuum the floor to remove debris and dirt.
Spot cleaning: Immediately clean up spills and stains using a mild detergent and water.
Prevent scratching: Use furniture pads or felt protectors under heavy furniture to avoid scratching the floor.
Prevent heat damage: Use coasters or trivets under hot objects to prevent heat damage.
Avoid harsh chemicals: Use only recommended cleaners and avoid harsh chemicals that can damage the floor.
Regular inspections: Check for any signs of damage or wear and tear, and address them promptly.
Protective measures: Consider using floor mats or rugs in high traffic areas to protect the floor from excessive wear.
Professional maintenance: Schedule regular professional cleaning and maintenance to ensure the floor stays in top condition.
YouTube is a video-sharing platform where users can upload, view, and share videos. It operates on a user-generated content model, allowing individuals and organizations to create channels and upload their own videos. Users can search for specific content, subscribe to channels, and interact through comments and likes.
To test new features on YouTube, you can opt to join the YouTube Experimental Features program. This program allows users to try out and provide feedback on experimental features that are being developed by YouTube. You can access the Experimental Features section in your YouTube account settings to participate.
Yes, according to the provided information, the copyright ownership by Google LLC will be valid until 2023. It is important to respect copyright laws and avoid using copyrighted content without proper authorization.
For contract termination related to YouTube, you should refer to the terms and conditions of your specific contract. YouTube provides guidelines and policies regarding contract termination, which may vary depending on the type of contract and the parties involved. It is advisable to seek legal advice if you are unsure about the process.
The terms of use for YouTube outline the rules and guidelines that users must comply with when using the platform. These terms cover aspects such as content creation, uploading, and sharing, as well as community guidelines for behavior and interaction. It is important to review and understand the terms of use to ensure compliance and a positive user experience.
Yes, YouTube can be used for commercial purposes. Many businesses and creators utilize YouTube as a marketing tool by uploading promotional videos, advertising products or services, and engaging with their target audience. However, it is essential to adhere to YouTube’s advertising policies and guidelines to ensure compliance with their terms of use and copyright regulations.


We Aim To Reply To All Enquiries With-in 24-Hours