10+ Years Experience
Specialist Resin Flooring
Enquire Today For A Free No Obligation Quote
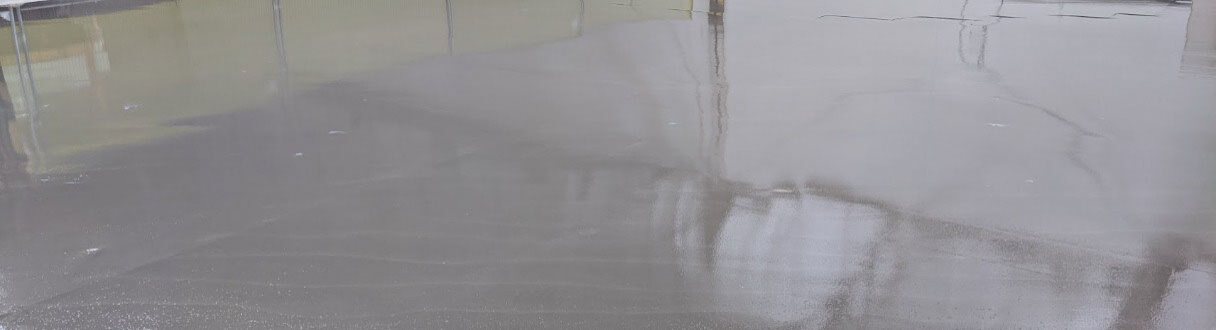
Resin flooring removal can be a daunting task, but with the right approach and tools, it can be accomplished successfully. Bid farewell to your old resin flooring with this step-by-step removal guide. Here’s what you need to know.
Recognizing the signs that it’s time to remove your resin flooring is crucial. Some signs include visible wear and tear, persistent damage and cracks, and safety hazards that compromise the integrity of the flooring.
Before you begin the removal process, it’s essential to prepare adequately. This involves gathering the necessary tools and equipment, such as protective gloves, safety goggles, a floor scraper, and a heat gun. Ensuring proper ventilation in the workspace is crucial for a safe removal process.
Follow these steps to remove your resin flooring effectively:
In addition to the step-by-step guide, there are alternative methods for resin flooring removal. Chemical strippers can be used to dissolve the resin, while grinding or sanding can effectively remove thicker layers.
To ensure a successful and safe resin flooring removal process, consider the following tips:
By following this step-by-step removal guide and implementing these tips, you can bid farewell to your old resin flooring and prepare for a fresh start.
Is your resin flooring showing signs of wear and tear? Or have you noticed persistent damage and cracks? This section explores the telltale signs that indicate it’s time to remove your resin flooring. From visible wear and tear to potential safety hazards, we uncover the indicators that suggest it’s time for removal. So, if you’re wondering whether to say goodbye to your old resin flooring, keep reading to learn what to look out for.
Visible signs of wear and tear on resin flooring indicate that it may be time for removal and replacement. These signs include:
– Cuts, scratches, or gouges in the surface
– Discolouration or fading
– Peeling or flaking of the resin coating
– Worn-down, uneven texture
If you notice these signs, it’s important to consider removing the flooring to prevent further damage and ensure a safe and attractive space. Pro-tip: Regularly inspect your resin flooring for any visible signs of wear and tear to address them promptly and maintain a long-lasting and durable floor.
Persistent damage and cracks are clear indications that it’s time to remove your resin flooring. These issues can compromise the integrity of the floor and pose safety hazards. To successfully remove the damaged resin flooring, follow these steps:
1. Clear the area and protect surfaces from debris.
2. Soften the resin flooring using appropriate methods.
3. Scrape and remove the softened resin carefully.
4. Clean and prepare the subfloor for a new flooring application.
Alternatively, chemical strippers or grinding/sanding techniques can be used for resin flooring removal. Always prioritize safety by wearing protective gear and ensuring proper ventilation during the removal process. Good luck with your resin flooring removal!
Resin flooring removal can be hazardous, so it is important to be aware of the potential safety risks. Here are some safety hazards to consider:
To ensure a safe resin flooring removal process, follow these suggestions:
Preparing for resin flooring removal is a crucial step in successfully bidding farewell to this resilient flooring material. In this section, we will provide you with the essential tools and equipment needed to confidently tackle the removal process. We will emphasize the significance of ensuring adequate ventilation to protect your health and create a suitable environment for the task. Let’s delve in and prepare to say goodbye to resin flooring once and for all!
Gathering the necessary tools and equipment is a crucial step in the process of removing resin flooring. To ensure a successful removal, follow these steps when gathering the required items:
Ensuring proper ventilation is essential during the removal of resin flooring to maintain a safe and healthy environment. Here are the steps to follow:
Open windows and doors to allow fresh air to circulate.
Utilise fans or HVAC systems to improve airflow and exhaust fumes.
Wear respiratory protection, such as masks, to avoid inhaling harmful particles.
Adhere to the manufacturer’s guidelines for any ventilation requirements specified for the specific resin product being removed.
In the 1940s, the significance of proper ventilation in workplaces became a priority after instances of poor air quality causing illness and even death. Consequently, regulations have been implemented to ensure proper ventilation, safeguarding the health and safety of workers.
If you want to remove your old resin flooring, you are in the right place. In this guide, we will take you through the step-by-step process of removing resin flooring easily. We will cover everything from clearing the area and protecting surfaces to softening the resin and scraping it away. Once the old flooring is removed, we will also show you how to clean and prepare the subfloor for your next renovation. So let’s get started and remove that resin flooring!
When removing resin flooring, it is important to start by clearing the area and protecting surfaces to ensure a smooth and safe process. Here are the steps to follow:
Remove all furniture, equipment, and other items from the area.
Cover adjacent surfaces, such as walls and skirting boards, with protective plastic sheets or tape to prevent damage.
Seal off any entrances or openings to prevent dust and debris from spreading to other areas.
Cover the floor with a drop cloth or heavy-duty plastic sheeting to catch any debris or liquids during the removal process.
Ensure proper ventilation by opening windows and using fans to remove fumes and improve air circulation.
By following these steps, you can protect the surrounding area and minimise the risk of damage or accidents while removing resin flooring.
To soften resin flooring for removal, follow these steps:
Heat application: Use a heat gun or blow torch to apply heat directly to the resin surface. This will soften the material, making it easier to remove.
Chemical removers: Apply a resin softening agent to the flooring. Let it sit for the recommended amount of time, allowing it to penetrate and soften the resin.
Scraping: Once the resin has softened, use a floor scraper or putty knife to gently scrape away the softened material. Be careful not to damage the underlying surface.
Repeat if necessary: For stubborn or thick layers of resin, you may need to repeat the softening process multiple times. Patience and persistence are key.
Remember to wear protective gear and follow safety guidelines when working with resin flooring. Always consult the manufacturer’s instructions for specific recommendations on softening and removing their product.
In addition, consider the following suggestions for a successful and safe resin flooring removal:
Ensure proper ventilation in the work area to minimise exposure to fumes.
Use appropriate tools and equipment for the task at hand.
Protect surrounding surfaces and furniture from damage during the removal process.
Dispose of the removed resin properly, following local regulations.
Consider hiring a professional if you are uncertain or uncomfortable with the removal process.
By following these steps and considering these suggestions, you can effectively soften and remove resin flooring with ease and safety.
To successfully remove resin flooring, follow these steps:
These steps will ensure a successful and safe removal process for the resin flooring. Remember to wear protective gear and follow proper ventilation procedures while working.
To ensure a successful and smooth process of removing resin flooring, it is essential to thoroughly clean and prepare the subfloor. Here is a step-by-step guide for cleaning and preparing the subfloor:
By following these steps, you can effectively clean and prepare the subfloor for the next flooring installation, ensuring a successful and durable result.
Alternative Methods for Resin Flooring Removal
When it comes to bidding farewell to resin flooring, you have options beyond the traditional methods. In this section, we’ll explore alternative approaches for removing resin flooring. From the power of chemical strippers to the precision of grinding or sanding, each sub-section reveals a unique way to tackle this task. So, if you’re seeking a step-by-step removal guide that goes beyond the norm, keep reading and discover these alternative methods for resin flooring removal.
Chemical strippers are commonly used for removing resin flooring. They effectively break down the bond between the resin and the underlying surface, making it easier to remove the flooring. Here is a table that outlines the advantages and disadvantages of using chemical strippers for resin flooring removal:
| Advantages | Disadvantages |
|---|---|
| 1. Chemical strippers work quickly | 1. They can emit strong fumes and odours |
| 2. They are readily available in the market | 2. Some chemical strippers may be toxic |
| 3. Often provide a cost-effective solution | 3. Not suitable for all types of flooring |
| 4. Can be easily applied and removed | 4. May require multiple applications |
| 5. Minimises damage to the subfloor | 5. Proper safety precautions must be taken |
When using chemical strippers, it is important to carefully follow the instructions provided by the manufacturer and ensure proper ventilation in the working area.
Grinding or sanding is a commonly used method for removing resin flooring. Here is a step-by-step guide to help you with the process:
Pro-tip: Ensure that you follow safety guidelines and take breaks when needed to avoid fatigue.
Pro-tip: Always refer to the manufacturer’s instructions and consider hiring a professional for large-scale or complex resin flooring removal projects to ensure safety and efficiency.
The installation process of resin flooring involves several stages:
A hygiene floor is commonly used in commercial kitchens and requires specific properties to ensure cleanliness. For hygiene floors, a polyurethane screed or polyurethane flow resin is applied during the floor coating stage.
The duration of resin flooring installation depends on various factors, including the specific requirements, extent of preparation, and potential repair work. The preparation stage can take anywhere from a few hours to a couple of days. It is recommended to consult with professionals for a more accurate estimate based on your project.
Yes, resin flooring can be applied in greasy warehouses. The preparation stage, including diamond grinding, helps remove and reduce existing floors, improving the performance and appearance of the resin flooring system. Additionally, oil tolerant primers can be used to address potential oil contamination.
YouTube is a video-sharing platform where users can upload, watch, and interact with videos. It allows content creators to reach a wide audience and offers various features for video discovery and engagement. YouTube is owned by Google LLC.
The YouTube reference data includes information about press, copyright, contacts, creators, advertising, developers, imprints, cancelling contracts, Terms of Use, Privacy Policy, Guidelines & Safety, and testing new features. It also highlights the ownership of YouTube by Google LLC.


We Aim To Reply To All Enquiries With-in 24-Hours